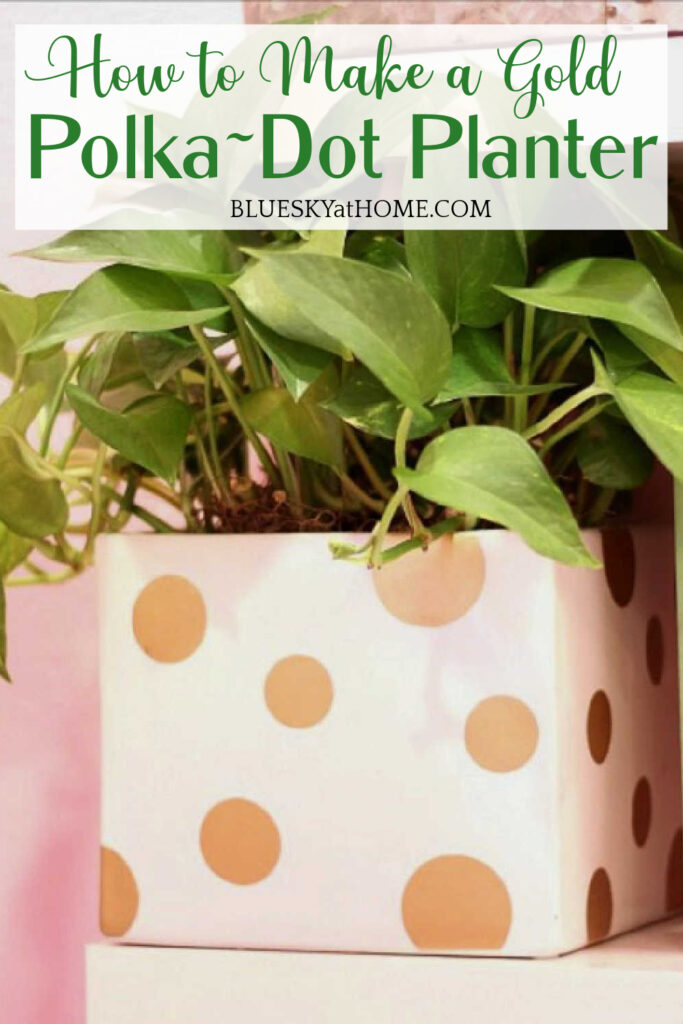
How to Make a Gold Polka~Dot Planter For Under $10
Do you love polka~dots? They are everywhere, on just about anything. You can even put them on a planter. Let me show you how to make a gold polka~dot planter for under $10.
A gold polka-dot planter for under $10 is a good deal. It’s such an easy project. Anyone can make it. You can make it

I actually completed this project a couple of months ago, on a warm day in October when I could actually get outside and work. I wanted to make a gold polka~dot planter for my office. So I had to share the polka~dot project. And I have a bonus DIY for you.
How to Make a Gold Polka~Dot Planter For Under $10
This post contains affiliate links to products that I love, use and highly recommend. If you order any product from this site, I may be compensated, but you will not pay one penny more.
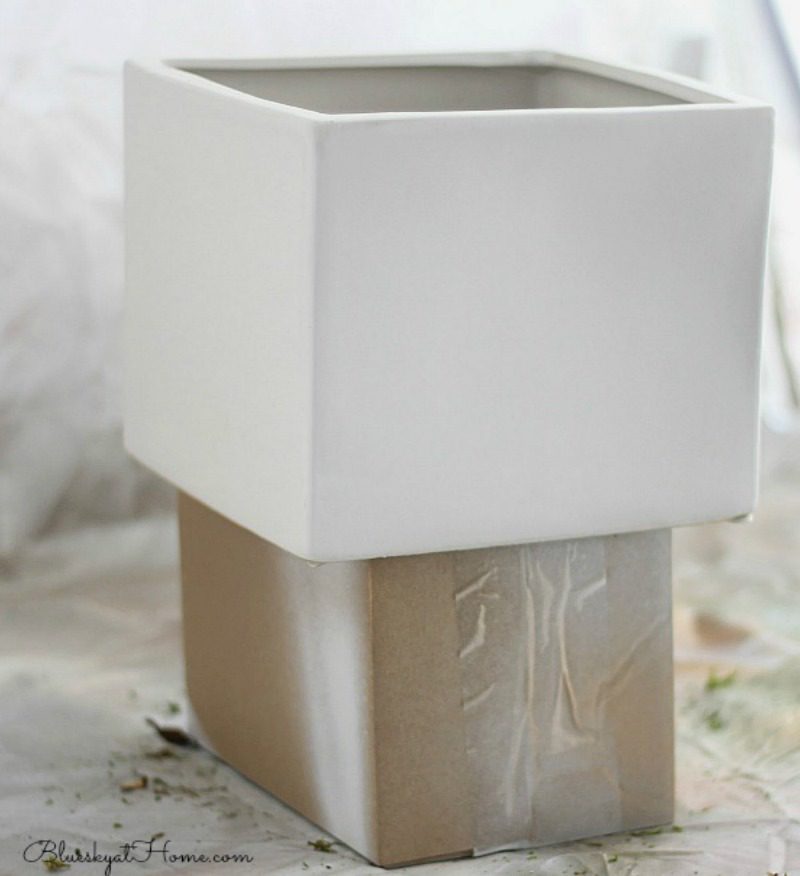
I left the Tabletop Spray Shelter (it’s become a permanent fixture in the garage) out on my work table and had to wait a few days for warm weather to return to paint outside.
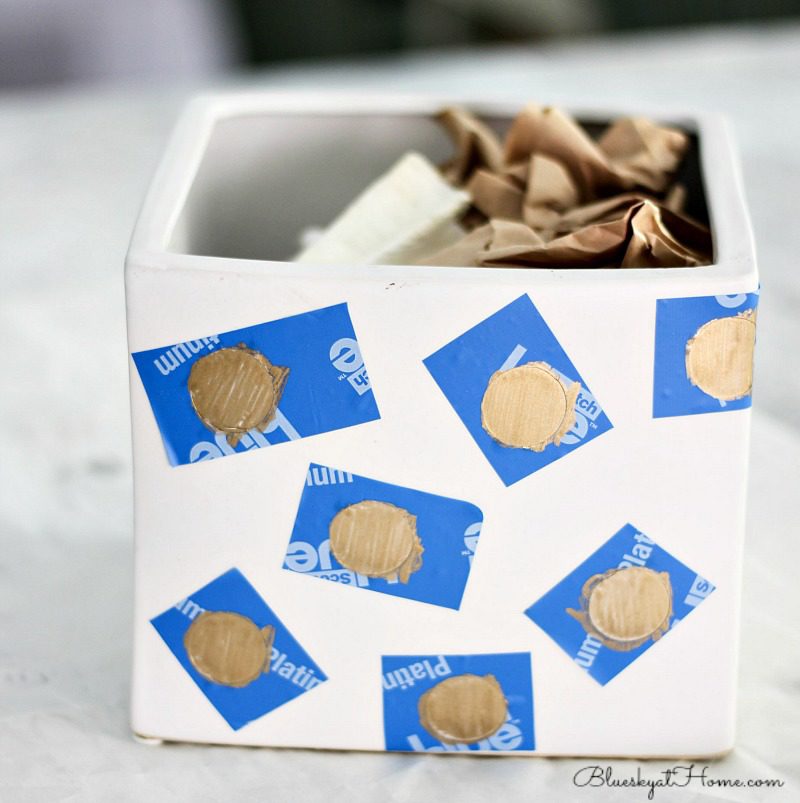
ORIGINAL PLANTER
Here is my original planter, an off~white ceramic cube. You could use any material, such as wood or terra cotta.
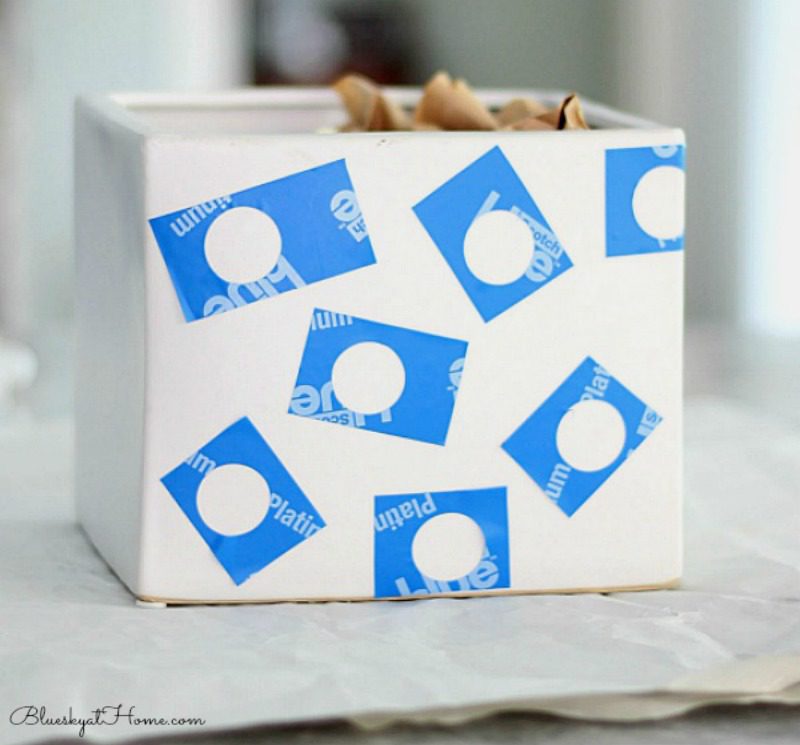
I knew that I wanted it white with gold polka~dots. I realized that to get that look I would have to spray paint the planter gold first, attach round stickers and then spray paint it again white. That approach didn’t make sense to me. If I wanted white polka~dots, I would have attached round stickers and then painted the planter gold.
TIP: You can have any combination of dots and background. Just remember that your first coat of paint will be the color of your polka~dots and the second coat will be your background.
So, how could I keep my white background and have my gold polka~dots. Here was my solution:
For my clipboard project, I cut out circles from 3M Scotch Blue painters tape using my Fiskar’s circle cutter ~ which left me with these strips of painters tape filled with circle cut outs.
I just cut the tape into pieces, like making a stencil, and attached them to the planter in a random pattern.
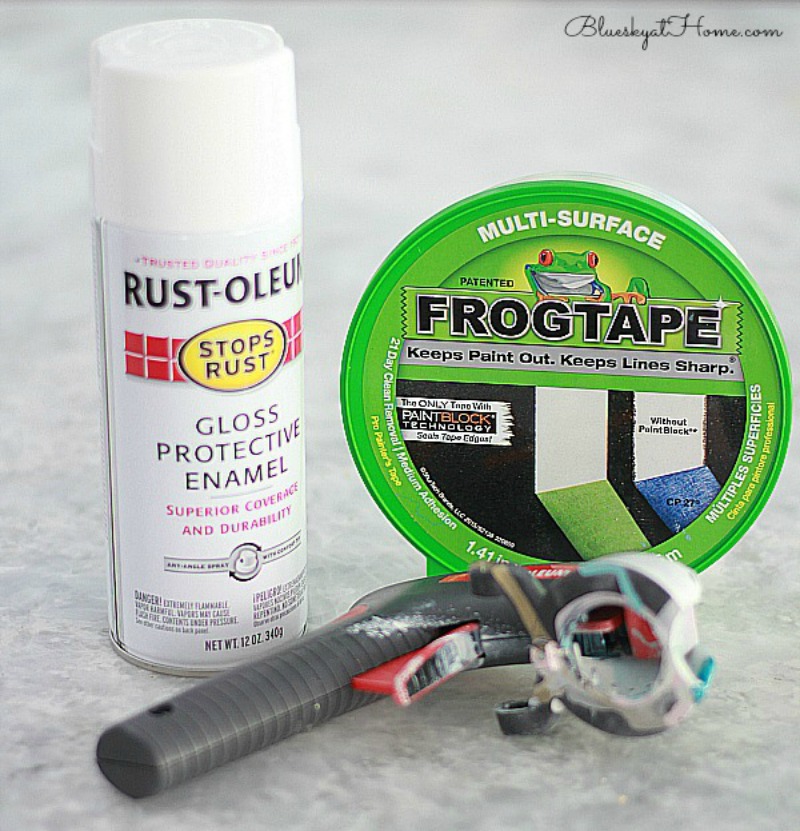
Now I needed to fill in the circles with gold. Since I couldn’t use spray paint, I bought a Krylon gold leafing pen at Joann.
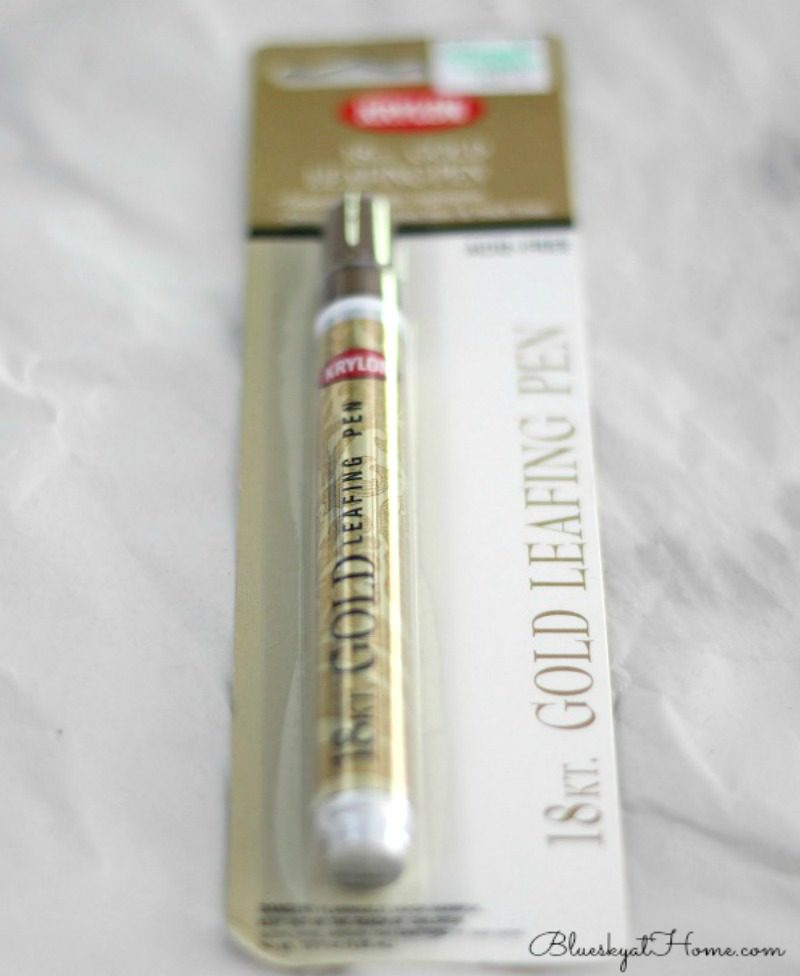
From here, it was easy to “fill~in~the~blanks”. Like paint by numbers.
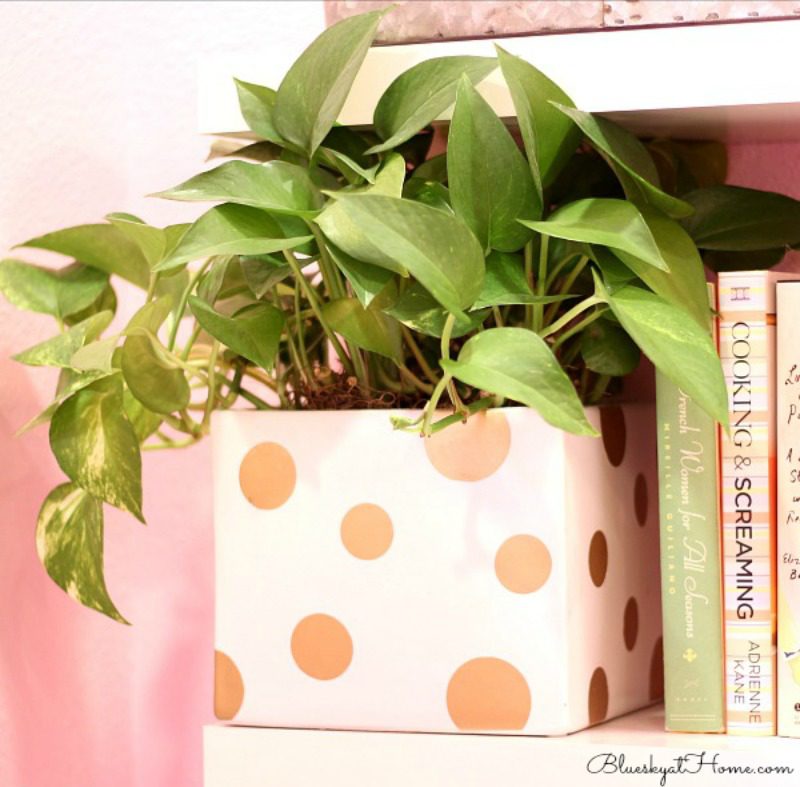
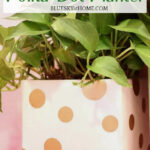
And I got exactly the look I wanted for my office.
I wrapped the planter in packing paper, placed it in a box, labeled the box “office planter” and set it out in the garage with the other boxes full of office supplies, books, and files.
Last week when I was able to unpack all my goodies, all I needed was a plant. Even though my color scheme is pink, white, aqua, and sea-foam green and grey, I wanted some greenery to give the office a homey and organic feel.
I needed an easy to care for plant. We had a pot of pothos ivy in the living room that I snitched for my office. I couldn’t be happier with the planter and the plant.
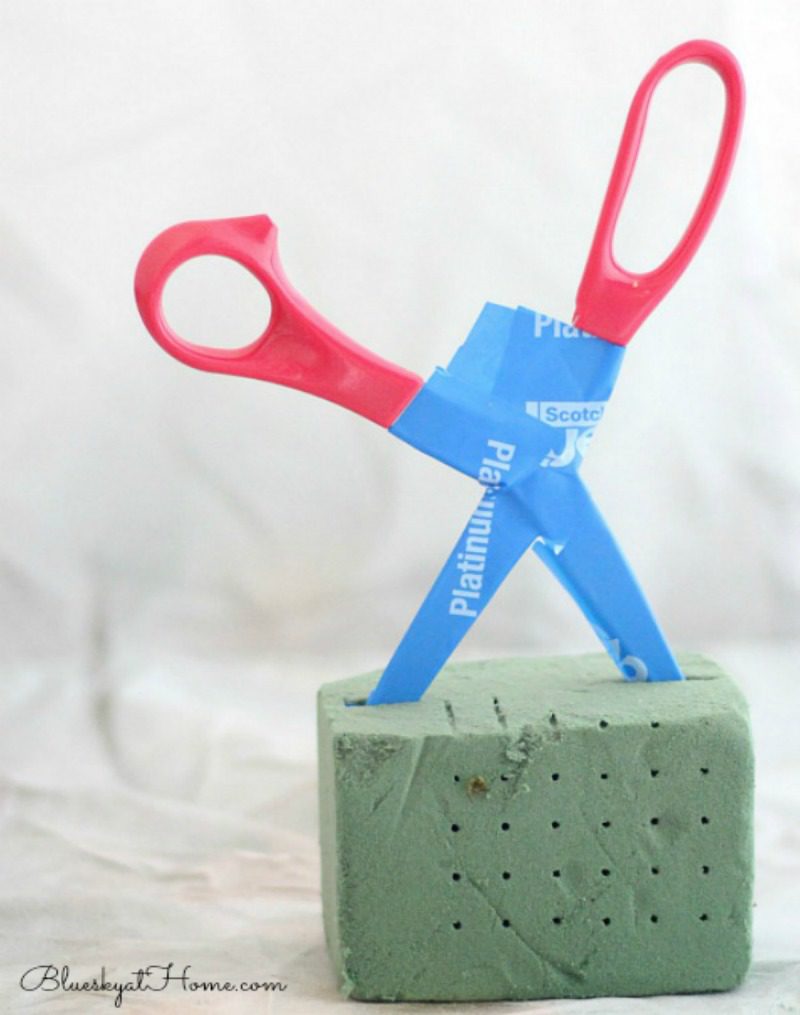
Bonus Project: I had 3 plain~Jane scissors that I thought could use a shot of gold. First I wrapped the blades in the 3M Command Painter’s Tape and stuck them in a piece of florist foam to hold them up.
Then I sprayed away with the same Rust~Oleum Gold Metallic spray paint that I used for my clipboard project. I repeated with 2 other pair of scissors.
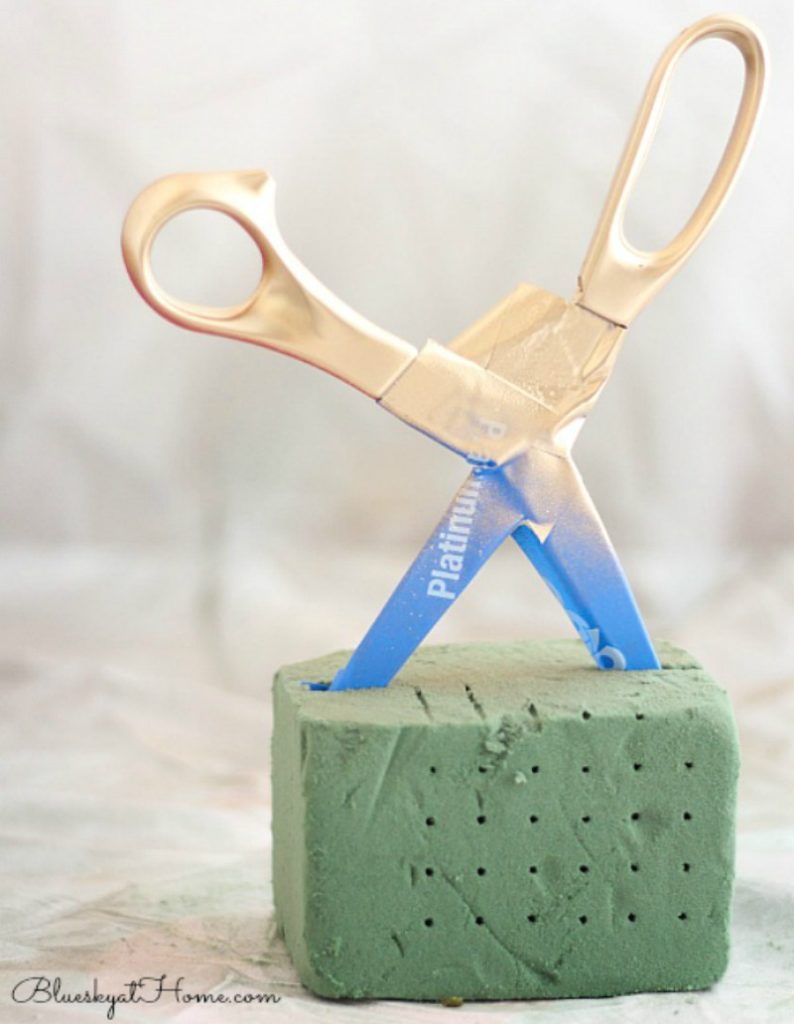
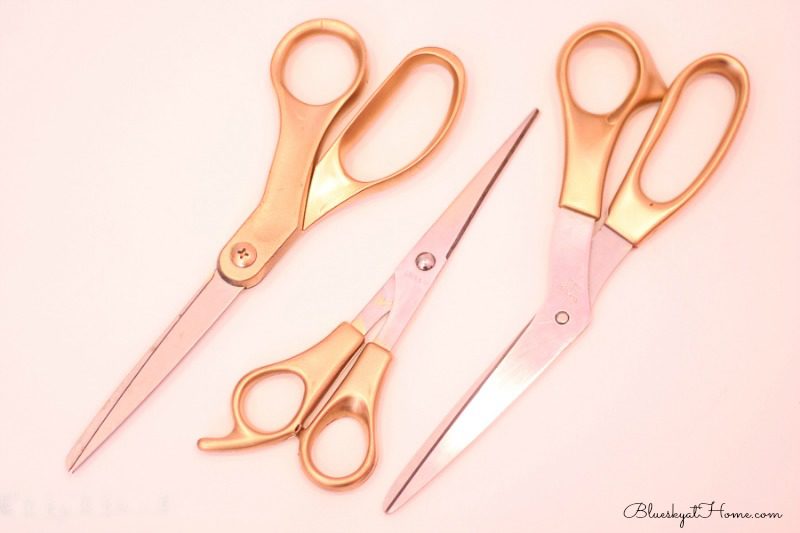
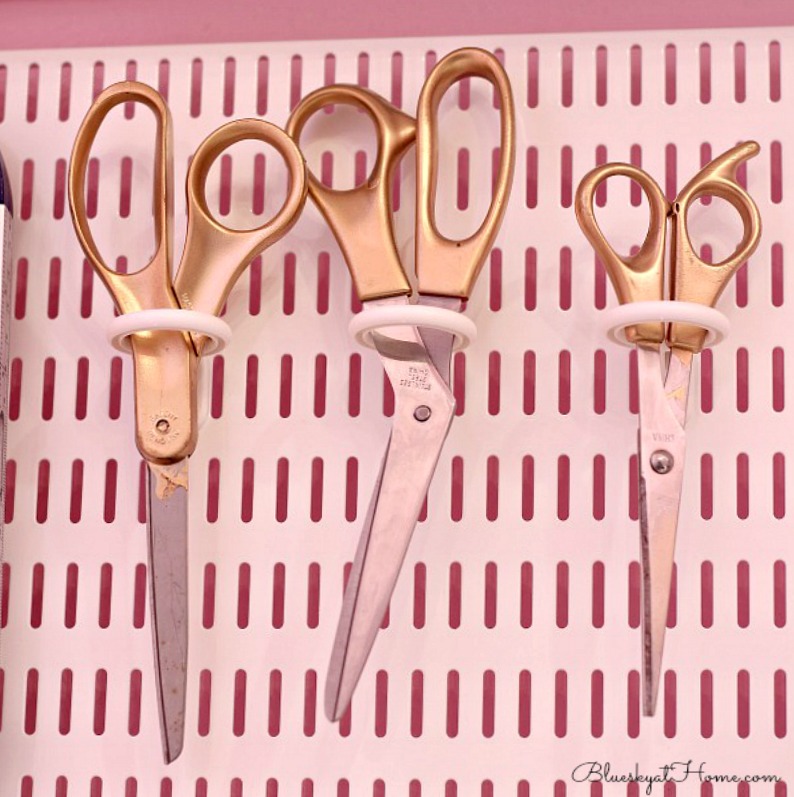
Now the scissors hang on my Container Store Utility Board in easy reach, but out of the way. (I’ll show you more of the Utility Board later.)
So, how much did my planter project cost?
Cost of planter: here’s where you can interpret the cost of this project for yourself. I bought the planter (with an orchid in it) last spring at a charity event. Yes, it cost more than $10, but the total amount went to our local county hospital’s rehabilitation department. So I’m considering it a wash. I hope that’s O.K. with you.
3M Command Painter’s Tape: a freebie from Haven Conference.
Krylon Gold paint pen: $6.49 (If I pro~rated the ink just for this project, it would be pennies.)
Scissors: had for years
Krylon Gold Metallic Spray Paint: already had from a previous project.
So the way I look at it, the only supply I had to buy for this under $10 project was the gold paint pen. I got exactly the planter I wanted for my office, and I have a pretty potted plant in my office to give a pop of green to the decor. Win~win all around
I hope that you will PIN this post so you can follow how to make a polka~dot planter, too.


OMGoodness! What a gorgeous planter. I can see making bunches and bunches of these. They’d make great gifts. Thanks for sharing at the #ThisIsHowWeRoll Link Party
Susan, thanks for the compliments. If I could find an inexpensive source for planters, I’d be making them left and right. Love the gift idea.
Wonderful, Carol! And the scissors, too! The planter looks terrific, inexpensive (I think I might even have all that at hand).
I hope you’ll be able to make lunch on Friday 20th. I’m looking forward to meeting the Texas bloggers!
It always amazes me what a little paint can do. And then sometimes I amaze myself when I come up with a solution that I didn’t know was a problem! Random acts of DIY. See you on the 20th!
What a cute idea! Pinning this for future use.
Angela, thank you so much! Pin away!
That’s an excellent tutorial! I also love the idea for painting scissors. I may have to do that. Now you have me thinking that my screw driver could do with a makeover as well 😉
Screw driver! I have one of those. Brilliant idea. We may just paint the world gold. Thanks for visiting and commenting.
Super cute and easy! I need to freshen up my office.
Shelly, thanks for your feedback. Your right so easy and I think cute too. I have a few more similar projects so keep in touch.
It’s lovely, you did a great job. I had no idea spray shelters existed, but now I want one too…Thank you for sharing at The Really Crafty Link Party this week. Pinned!
Teresa, the spray shelter will change your painting life. I didn’t like to spray paint because of the overspray, but now I love it. You can click on the link in the post and order one. I highly recommend it.
What a great planter. Love it.
Thanks for sharing at Over The Moon Party,
Bev
Beverly, thanks for the positive feedback. You have a great link party.
Hi Carol! It’s so nice to meet ya! I would say that punching circles out of the painting tape was genius! That never would have occurred to me in a million years! And I seriously need one of those spray paint shelters!
Jane, great to meet you. Actually, the circle cutouts were a by~product from an earlier project. I needed circles to decorate clipboards and when I was left with strips of cutouts, I saved them “just in case”. So glad I did. I still have 2 more strips of cutouts so I’ll probably find a use for them too.
This is a darling project Carol!
And I think I need that spray shelter- I can make a real mess spray painting:)
Happy New Year!
This was a fun blog event, wasn’t it?
Laura, you of all people definitely need a spray shelter. You can order directly from my post!
The planter is so cute and clever.
Sandy, thank you for visiting Bluesky Kitchen and commenting. Glad you liked the planter.
Such a clever way to “tape off” polka dots. I love the white and gold. It looks super fresh.
Thanks Lisa. Sometimes we can surprise ourselves. I love the white and gold too for a fresh girly look.
Oh my! I am stealing this project! My own office is all gold and white and black and both of these projects would be perfect! I just picked up some gold gilding paint and am looking forward to seeing how it looks on a paper mache bowl. Thanks for stopping by and sharing at Celebrate Your Story!
Steal away. That’s what projects are for. Imitation is the highest form of flattery!
Very cute Carole, and I am jealous of your spray tent, I need one of those!
The spray shelter is a lifesaver. It will open all sorts of possibilities, not to mention keeping spray paint off your car, clothes, and garage floor. You can click on the link in my post and order one!
What a cute planter and that spray shelter looks SO handy. I am generally out in the backyard in my bare feet spraying things in old cardboard boxes. 🙂
Laura, the spray shelter will change your painting life. One of my best DIY paint tools ever.
Carol, this is so adorable!! I love pink and the gold dots make it perfectly girlish. I can’t wait to see the completion of your office. 😉
Thanks, Stacey. Thanks for giving us the opportunity to share our projects.
I love this! So pretty. I have been wanting one of these paint shelters for quit awhile now. You may have convinced me to buy one today. I painted my scissors gold too… love them. Thanks so much for sharing!
Tammy the spray shelter is one of the best tools ever. Clink on the link in my post and you can order one in a second. You’ll be glad that you did.
Love the gold, super cute and easy planter but those scissors are classic. I may have to try that same tip with copper, because we have a can of that color out in the shed. Loving this $10 challenge, fun to see what everyone is sharing.
Copper or silver or any color that you want. So easy. I was proud of myself for thinking of the florist foam to hold the scissors.